
Harley Handlebar Fitment Chart by Model and Year Cross-Reference
Most handlebar returns are not caused by width or rise, but by a mismatch in control clamp diameter.
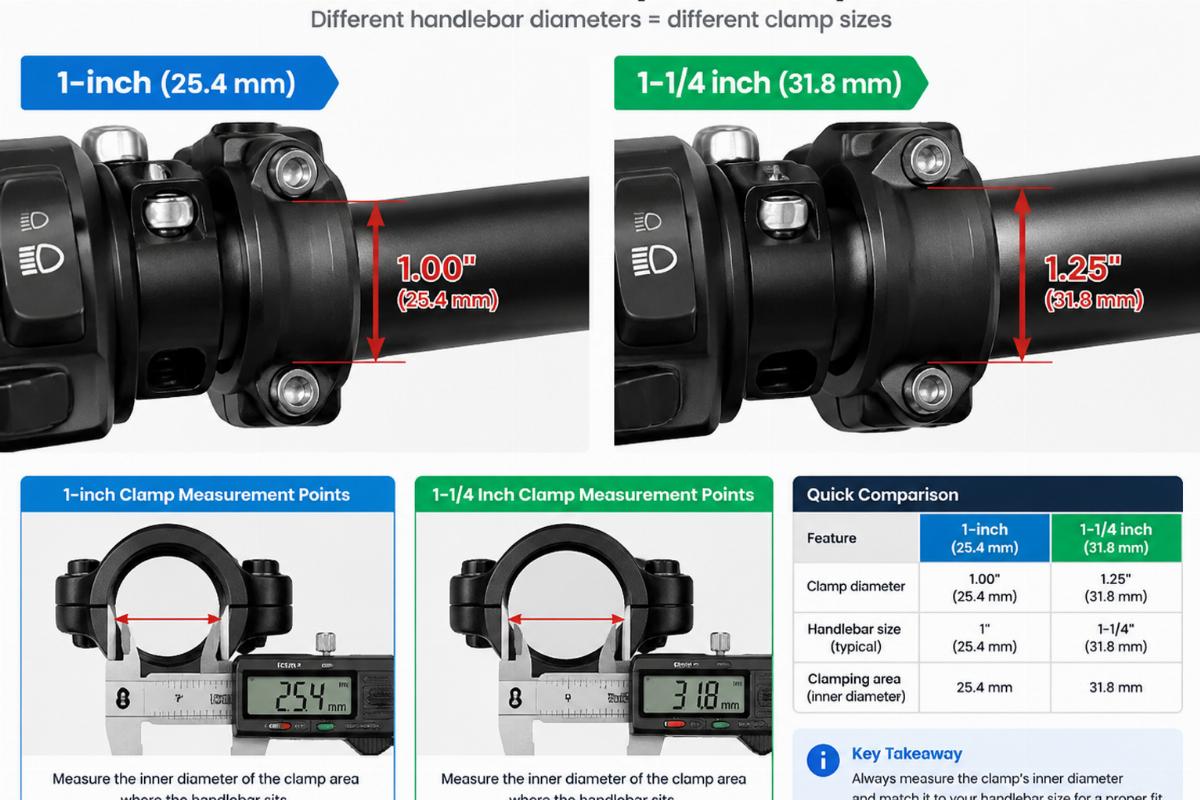
To ensure correct fitment, you must verify the control clamp diameter (1-inch versus 1-1/4 inch) and internal wiring path against the specific model year. The critical transition occurred between 1982 and 1984, shifting from Shovelhead to Evolution standards, with further distinctions required for Twin Cam platforms. Always measure the existing control area with calipers before ordering.
I learned this the hard way at a Chicago trade show. A custom shop owner from California handed me a parts list for a late-model Shovelhead, specifically requesting internally wired bars. I quoted standard Evolution-style replacements, assuming the post-1984 compatibility was universal. He installed them, only to find the switches sliding loosely on the clamps. The issue was not the bar shape, but the diameter. His bike sat right on the cusp of the manufacturing changeover, retaining 1-inch clamps while I had supplied bars designed for 1-1/4 inch controls. That email complaint changed how I approach every inquiry. Now, I do not trust verbal descriptions of “standard” fitment. I rely on the Harley handlebar fitment chart data and physical measurements. [NEED_CITE: historical transition years for Harley-Davidson control clamp diameters]
Understanding these mechanical nuances prevents costly returns and keeps your inventory accurate. Let us break down the specific eras and dimensions that define successful installation.
Why Do Handlebars Fail to Fit?
The primary reason for fitment failure is the assumption that aesthetic dimensions dictate mechanical compatibility. Buyers often focus on width, pullback, and rise, neglecting the interface where the controls mount. This area, known as the control clamp zone, has strict diameter requirements that vary by era.
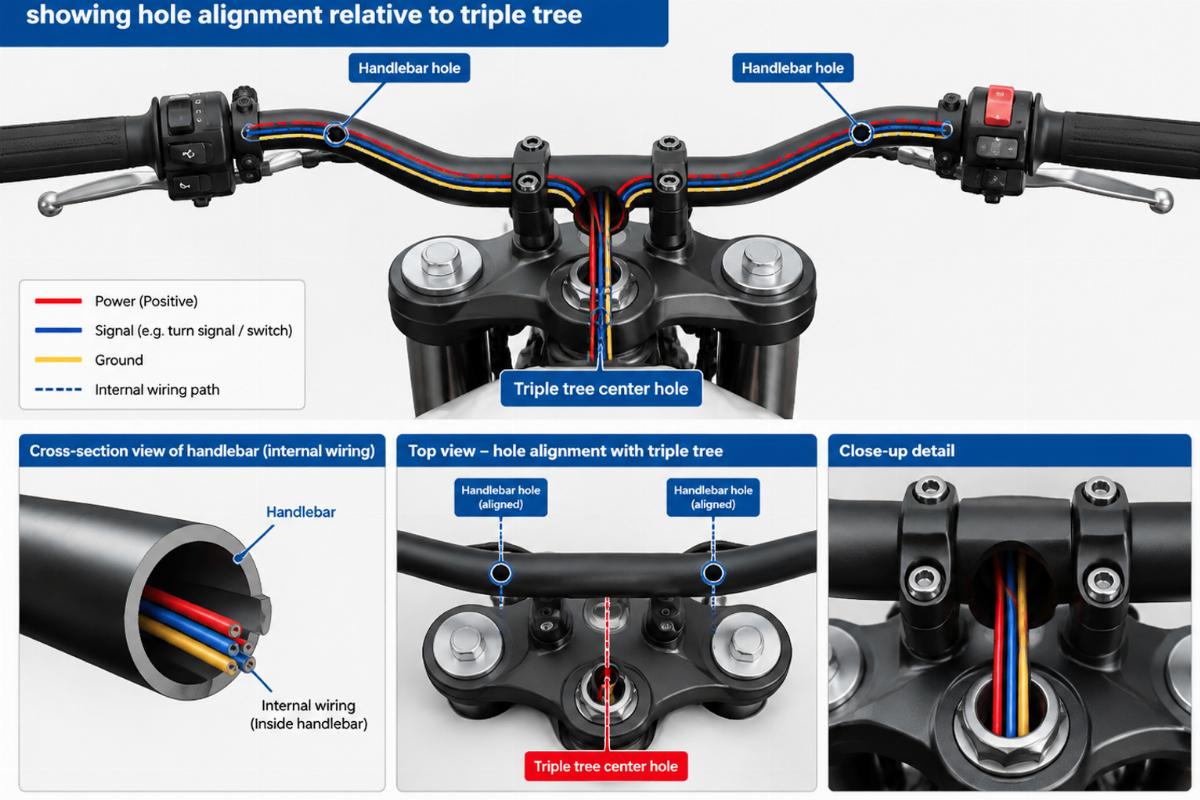
If the diameter is incorrect, the switch housings will either not close properly or slide along the bar under vibration. Both scenarios create safety hazards and immediate customer dissatisfaction. Furthermore, internally wired bars require precise hole placement. If the holes do not align with the triple tree and neck angle, the wiring harness can pinch or chafe against the frame during steering. [NEED_CITE: common causes of motorcycle electrical wire chafing due to handlebar fitment]
When sourcing parts, distributors must look beyond the visual profile. The Harley handlebar fitment chart serves as a technical validation tool, highlighting these hidden constraints. It is not enough to know a bar fits a Softail; you must know which Softail year and which neck geometry it accommodates.
Shovelhead to Evolution: The Critical Transition
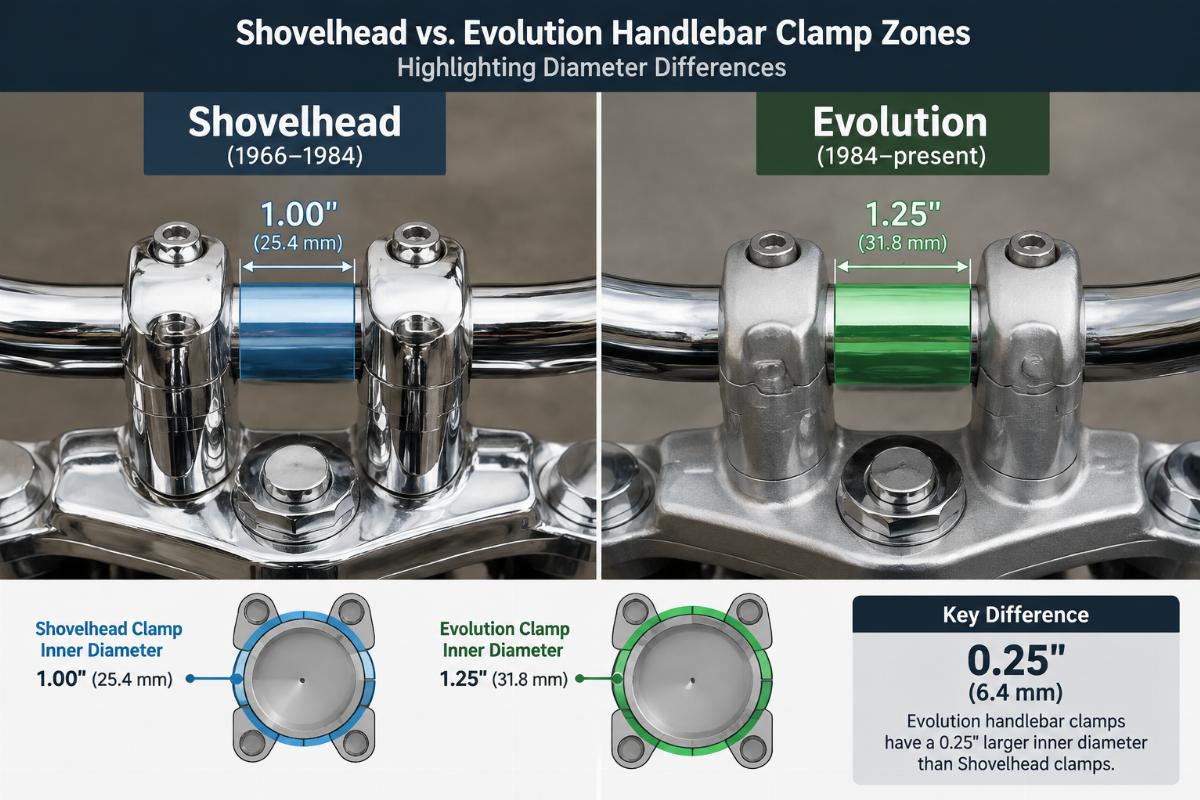
The period between 1982 and 1984 represents the most significant shift in handlebar specifications for Big Twin motorcycles. Before this window, Shovelhead models predominantly used 1-inch diameter bars at the control clamp area. As Harley-Davidson transitioned to the Evolution engine platform, they moved toward 1-1/4 inch clamps for many models, though the change was not instantaneous across all lines.
A common error involves ordering Evolution-style bars for a 1983 model without verifying the specific build date or original equipment. Some late Shovelheads retained the older 1-inch standard, while early Evolutions adopted the larger diameter. Mixing these results in loose controls or the need for shims, which compromise structural integrity.
| Era | Typical Clamp Diameter | Wiring Style | Key Fitment Note |
|---|---|---|---|
| Pre-1982 Shovelhead | 1-inch | External | Standard narrow clamp area |
| 1982-1984 Transition | Mixed (1-inch or 1-1/4 inch) | External/Internal | Verify specific model year |
| Post-1984 Evolution | 1-1/4 inch | Internal/External | Wider clamp area for modern switches |
This table illustrates the general trend, but exceptions exist. For instance, certain custom or special edition models may deviate from the factory standard. Distributors should use the Harley handlebar fitment chart to cross-reference OEM part numbers for these transition years. [NEED_CITE: OEM part number supersession history for Harley-Davidson handlebars]
I once assisted a restorer working on a 1983 FXE. He assumed the 1-1/4 inch standard applied because the bike had an Evolution-style engine swap. However, the frame and neck remained original Shovelhead specification. The bars he ordered had pre-drilled holes for internal wiring that did not align with his triple tree. By checking the clamp diameter first, we identified the mismatch before shipping. This attention to detail saves time and preserves buyer trust.
Evolution and Twin Cam Fitment Nuances
Moving into the late 1980s and 1990s, the Evolution platform standardized the 1-1/4 inch clamp for most Big Twins. However, the introduction of the Twin Cam engine in 1999 brought new complexities, particularly regarding internal wiring. While the clamp diameter remained consistent for many models, the depth and position of internal wiring channels changed.
Twin Cam frames often feature different neck angles and triple tree designs compared to earlier Evolution models. A bar designed for an Evolution Softail may have internal wiring holes that exit at an angle incompatible with a Twin Cam chassis. This misalignment forces the wires to bend sharply, leading to insulation damage and short circuits over time. [NEED_CITE: technical service bulletin on handlebar wiring clearance for Twin Cam models]
Additionally, switch housing clearance becomes a critical factor with high-rise bars. On Softail models, aggressive pullback or excessive rise can cause the switch housings to contact the fuel tank at full lock. This is not a defect in the bar but a geometric limitation of the frame. Builders must verify the rise and pullback against the specific model’s tank shape.
The Harley handlebar fitment chart helps distinguish between these subtle variations. It identifies which bars are drilled for Wide Glide versus Narrow Glide setups and ensures the internal path matches the frame’s routing requirements. Ignoring these details leads to functional failures that are difficult to diagnose after installation.
How to Verify Fitment Before Ordering
Preventing fitment errors requires a systematic verification process. Relying on generic year ranges is insufficient due to mid-year production changes and custom modifications. Instead, adopt a measurement-first approach.
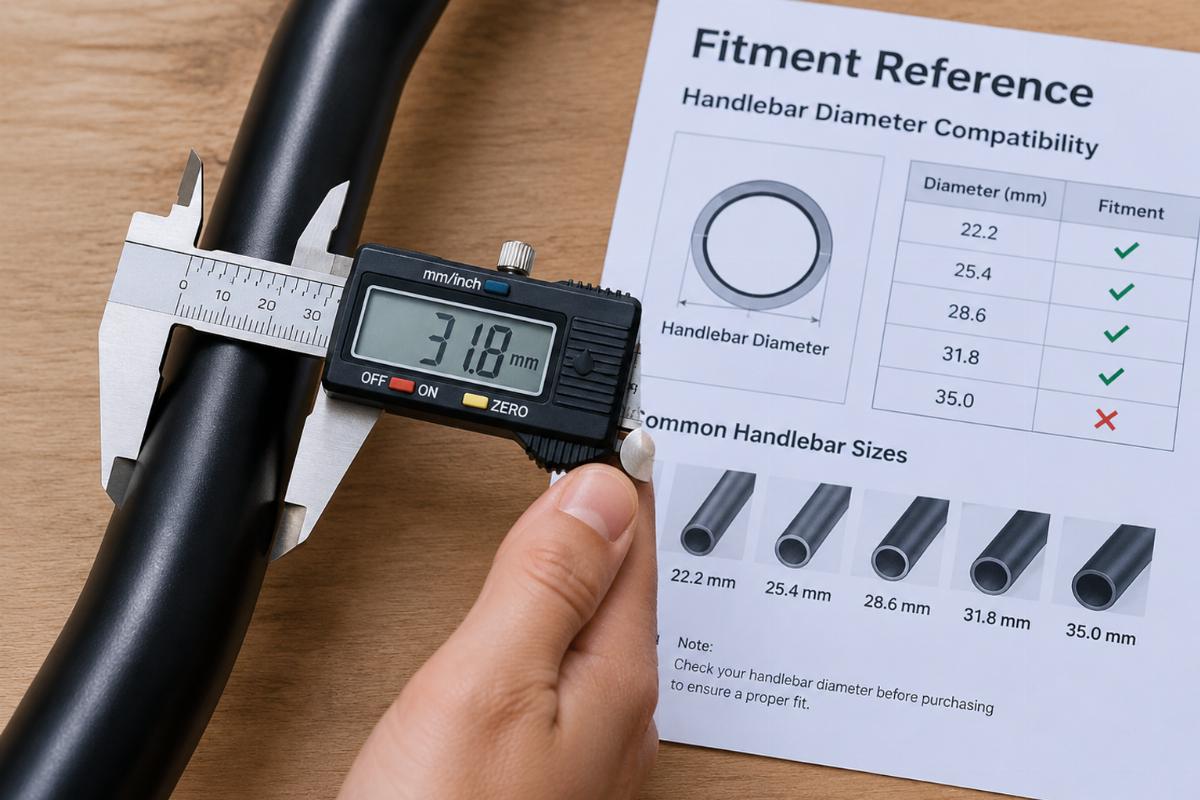
First, measure the control clamp area of the existing handlebars or the motorcycle’s stock bars using digital calipers. Do not use a tape measure, as it lacks the precision needed to distinguish between 1-inch and 1-1/4 inch diameters. Record this measurement explicitly.
Second, identify the wiring requirement. Determine if the bike uses external wiring or if the bars must support internal routing. For internal wiring, check the diameter and position of the exit holes. Compare these against the triple tree spacing and neck angle of the specific model. [NEED_CITE: method for measuring handlebar internal wiring hole alignment]
Third, cross-reference the OEM part number. Even if the bike has aftermarket parts, the original equipment specification provides a baseline for clamp diameter and wiring style. Use the Harley handlebar fitment chart to find superseded part numbers that match these specifications.
Finally, consider the switch housing type. Modern switch housings may have different mounting tab widths than vintage units. Ensure the bar’s clamp area can accommodate the specific housing without interference.
| Verification Step | Tool Required | What to Check |
|---|---|---|
| Clamp Diameter | Digital Calipers | 1-inch vs 1-1/4 inch |
| Wiring Path | Visual Inspection | Hole alignment with triple tree |
| OEM Reference | Parts Catalog | Superseded part numbers |
| Switch Clearance | Physical Test | Tank contact at full lock |
By following these steps, distributors can provide accurate recommendations. I always request photos and measurements from buyers when uncertainty exists. This practice reduces return rates and ensures the parts we supply meet the technical demands of the build. The Harley handlebar fitment chart is an essential reference in this process, offering a quick check against known standards.
Conclusion
Accurate handlebar fitment depends on precise clamp diameter and wiring alignment, not just visual style.
Always verify the 1-inch versus 1-1/4 inch clamp standard for the specific model year, especially during the 1982-1984 transition. Use calipers for measurement and cross-reference OEM numbers to ensure internal wiring paths match the frame geometry. This technical diligence prevents returns and ensures safe, reliable installations.