
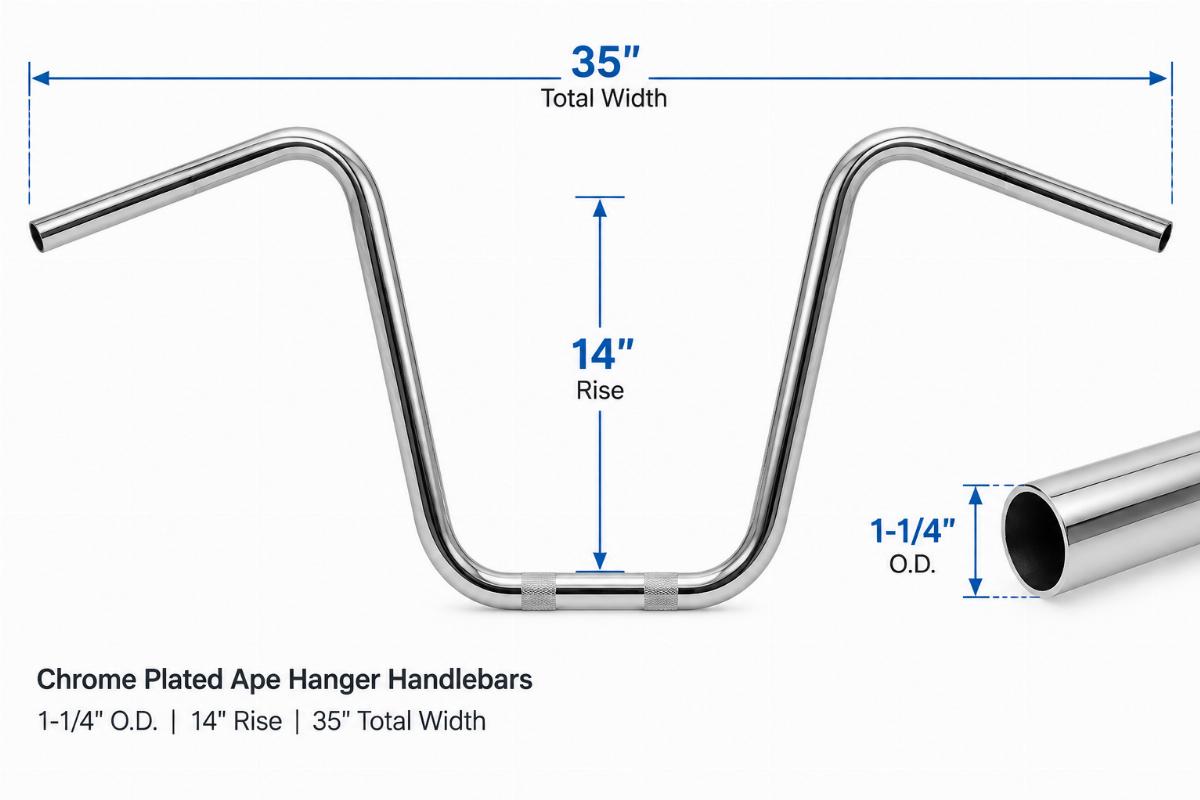
Chrome Ape Hanger Handlebars 1-1/4″ O.D. – Fits Custom
Controls and chassis catalog depth — confirming riser center spacing and bar diameter across custom platforms prevents geometry mismatches before shipping.
Product Specification
| Parameter | Value |
|---|---|
| Part Type | Handlebars |
| Finish | Chrome Plated |
| Diameter (O.D.) | 1 1/4″ |
| Rise | 14″ |
| Total Width | 35″ |
| Center Width | 10″ |
| Pullback | 9″ |
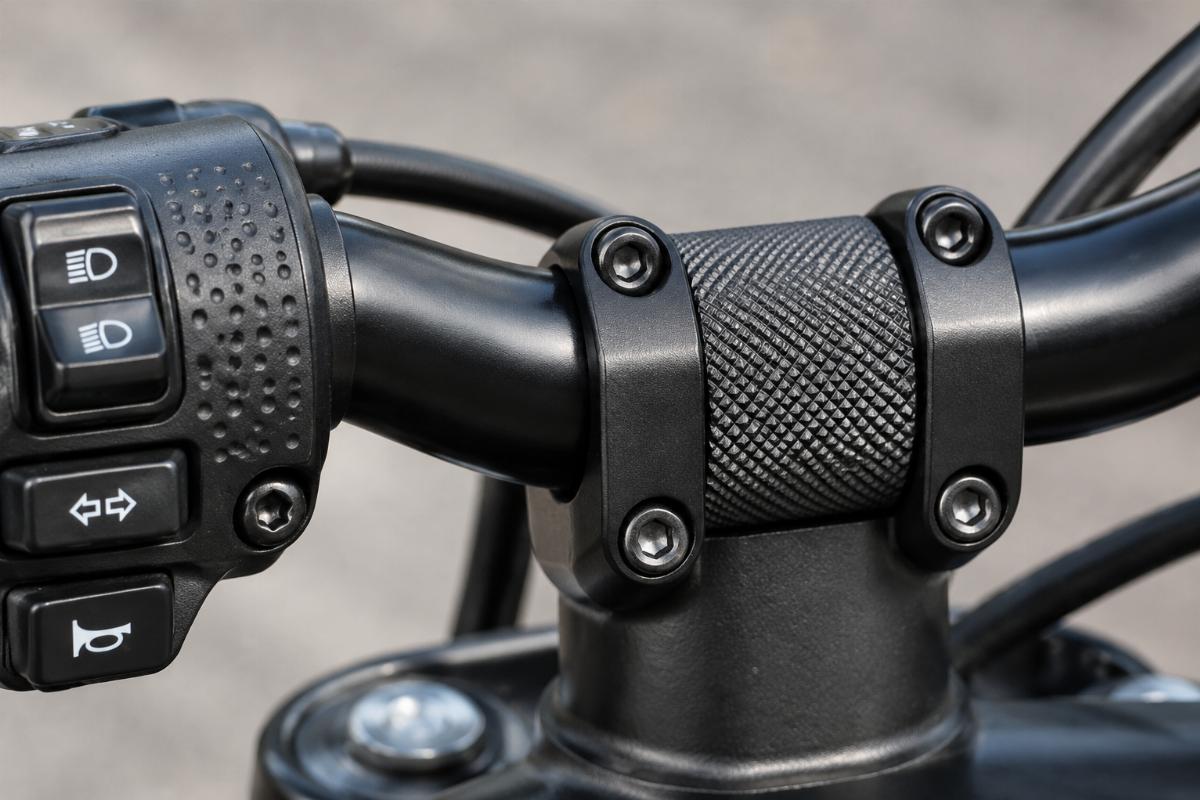
| Features | Dimpled at the switch area; knurled at the riser area; drilled for internal wiring |
Fitment
| Platform | Year Range | Notes |
|---|---|---|
| Custom use | Confirm with model and year | Designed for risers that mount on 3 1/2″ centers; dimpled at the switch area for use with any year handlebar controls |
Independent aftermarket part. Not manufactured, sold or endorsed by any motorcycle manufacturer. Model names and OEM numbers are used for fitment reference only.
Why Missing Pullback and Riser Center Data Ruins Custom Builds
A 14″ rise ape hanger handlebars 1-1/4″ o.d. set will not align if the riser centers and pullback are ignored.
Handlebar listings frequently omit critical dimensions like pullback, center width, or knurling details, leaving builders to guess how the bars will sit in the triple tree. When a custom shop receives bars without verified 3 1/2″ riser center spacing, the clamping area may not match the tree, causing the bars to slip or sit at an unsafe angle. Verifying these exact measurements against the frame geometry ensures the controls align properly with the rider’s stance [NEED_CITE: frame geometry and riser spacing variations across custom builds].
Verifying Riser Center Spacing for 1-1/4″ Bars
When fitting these ape hanger handlebars 1-1/4″ o.d., the 10″ center width must perfectly match the 3 1/2″ riser mounting centers on the triple tree. If the spacing is off by even a fraction of an inch, the knurled riser area will not seat flush, leading to steering play. Always measure the tree centers before ordering to guarantee a secure clamp.
Checking Dimple Placement for Switch Housings
The dimpled switch area on these bars is designed to accommodate standard handlebar controls without requiring additional drilling. However, switch housing depths vary across different aftermarket setups. Confirming that your specific switch housings match the dimple placement prevents the need for modifying the bar surface or buying new controls [NEED_CITE: switch housing depth variations across control manufacturers].
Interpreting the 14″ Rise and 35″ Width
A 14″ rise combined with a 35″ total width and 9″ pullback drastically changes the rider’s reach and steering leverage. This specific geometry requires checking the custom frame’s neck angle and tank clearance to ensure the bars do not interfere with the fuel cell at full lock. The drilled holes for internal wiring must also be aligned with the fork neck entry point [NEED_CITE: steering clearance and wiring routing paths for high-rise handlebars].
The Hidden Cost of Unverified Handlebar Dimensions
Ordering bars without confirming the exact pullback and width often results in the motorcycle sitting on the shop floor for weeks. If the 35″ width is too wide for the custom tank, or the 9″ pullback forces the rider too far forward, the entire front-end setup may need to be torn down and replaced. This rework wastes labor hours and delays the build timeline significantly.
Sourcing Controls with Confirmed Dimensions
We verify the 1 1/4″ O.D., 14″ rise, and 3 1/2″ riser center requirement against your specific custom platform before quoting. Our catalog provides detailed dimension sheets so you know exactly how the chrome plated finish and drilled wiring holes will interact with your setup. You can order a single piece for fitment confirmation before committing to bulk inventory for your shop.
Documentation Provided
- Fitment sheet stating applicable custom platforms and year ranges
- Key dimensions including bar diameter, rise, width, and pullback
- Finish specification for chrome plating consistency
- Cross-reference sheet with OEM numbers marked reference only
- Quality inspection record covering dimple and knurl placement
Receiving and Pre-Installation Checks
- Verify the 1 1/4″ O.D. matches your riser clamp size before mounting
- Check the 14″ rise and 35″ width against your custom frame clearance
- Inspect the chrome plated finish for any shipping damage or plating flaws
- Confirm the dimpled switch area aligns with your specific control housings
- Ensure the drilled holes for internal wiring are clear of debris
- Store in a dry environment to maintain the chrome plated surface condition
Send Your Custom Specs for a Fitment Check
Provide your exact model, year, and riser center spacing to verify if this 14″ rise setup matches your geometry. Share photos of your current triple tree or old bars if the dimensions are unknown. Let us know if you need a single sample piece to test the dimpled switch area and internal wiring fitment before placing a larger order.
Frequently Asked Questions
Q: How do I measure the rise and pullback for custom handlebar fitment?
A: Measure the rise from the bottom of the bar base to the highest point of the grip area. Pullback is measured from the center mounting point to the rear-most edge of the grip. Comparing these numbers to your frame geometry ensures the ape hanger handlebars 1-1/4″ o.d. will clear the tank and align with your riding position.
Q: Will the dimpled switch area fit my specific aftermarket controls?
A: The dimples are placed to accommodate standard aftermarket switch housings. You must verify the depth and width of your specific control housings against the dimple placement. If your housings are non-standard, you may need to check if they sit flush against the dimpled surface without requiring bar modification.
Q: Can I order a single set of handlebars for a one-off custom build?
A: Yes, we support single-piece minimum orders for custom builders and repair shops. You can order one set to verify the 10″ center width and 3 1/2″ riser center spacing on your specific triple tree before purchasing additional inventory for future projects.
Q: How do I confirm the internal wiring holes will align with my fork neck?
A: Check the routing path from the bottom of the bar to the fork neck entry point. The drilled holes must align with the tree’s internal channels. If your custom tree lacks internal wiring channels, you will need to plan for external routing or modify the tree to accommodate the wiring path.